|
|
I recently built a Makerbot, and have been working on getting it to print nice-looking objects. This was an interesting learning process, and I thought I’d outline what I did, in case it is of interest. Most of the effort was in configuring a software tool called Skeinforge, a program that will take a 3D model, and interpret it as instructions to a 3D printer.
I really wanted to print a piece called a “Z-Axis Wobble Arrester”, an upgrade that improves output from the Makerbot. I was to discover that this is actually a very difficult piece to print, due to the narrow walls and fine tolerances of the “springs”.
Here is a picture of various “drafts” of the piece:
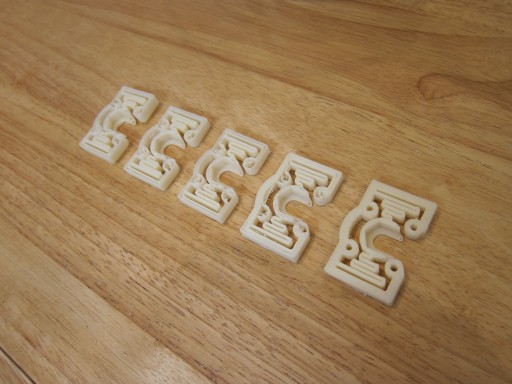 Five attempts to print a part The earliest attempts are on the left, getting steadily better until I got to the part on the right, which is actually functional. Keep reading for a summary of the process I went through to get to a finished part…
Continue reading Calibrating skeinforge for a Makerbot
I recently put together Makerbot #1479, from Batch XIII. This is a simple 3D printer, a device that actually prints real objects using ABS plastic. It’s sold as a kit of parts for self-assembly.
The process was quite straightforward, but I made a number of modifications that seem to make it more reliable and easy to use.
Here it is, in all its glory:
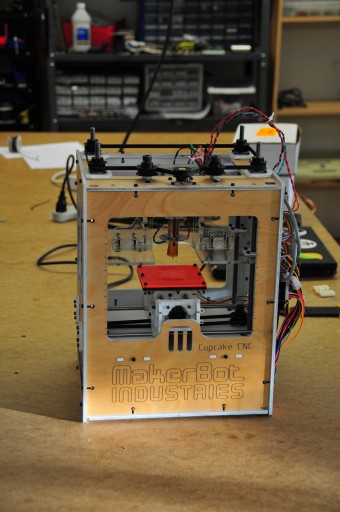 Makerbot 1479 Note the elegant paintjob, white interior and two coats of matte urethane on the exterior. The quality of the plywood on recent kits is really nice, and I wanted to show it off.
Assembly was pretty straightforward, and the Makerbot kit is very cleverly designed. However, it pays to read the comments on the Wiki at each stage: there are changes and suggestions that are not in the main instruction text.
After a lot of tuning, I now have some good configuration settings, and have had some good results printing complex parts. This one is an upgrade for the Makerbot itself:
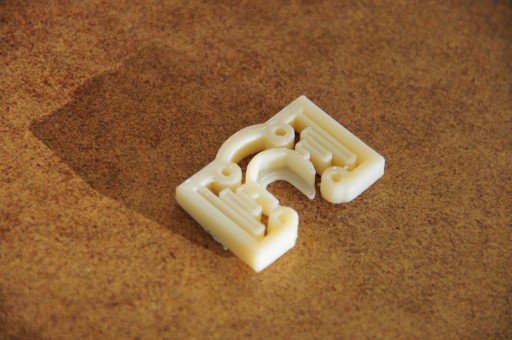 Z-Stage Wobble Arrester I made a number of modifications along the way, keep reading after the break to hear about them.
Continue reading Making a Makerbot (part 1)
Exploring a different view of panoramic footage, showing where you’ve been and where you’re going in a single simultaneous stream.

Exploring a different view of panoramic footage, showing where you’ve been and where you’re going in a single simultaneous stream.
Cast: Gian Pablo Villamil
Tags: video art and san francisco
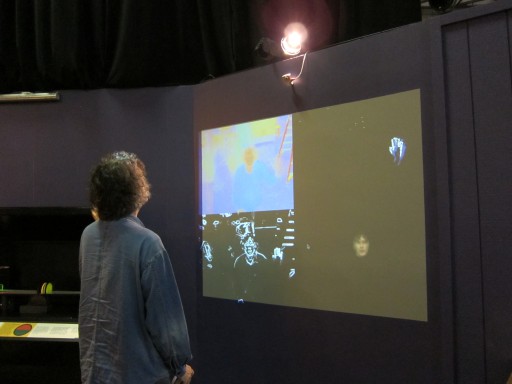 "Visual Streams" installation during testing For the past several months I’ve been volunteering at the Exploratorium, the famous science museum and playground in San Francisco. One of the projects I’ve been working on is called “Visual Streams”, an installation that represents the different aspects of the human visual system. I’ve built on previous work by Bill Meyer and Richard Brown of the Exploratorium, and some extremely useful JavaScript programming by Bill Nye.
The quadrants of the screen represent: color vision without brightness information (equiluminance), motion, face detection and edge detection. I’ve learned a lot of interesting things in the process, not just about the human visual system, but also how difficult it is to accurately represent color using digital media. The project relies on a lot of the reliability and ease-of-use techniques that I’ve developed for use in art projects.
The installation is all built in Max/MSP, and relies heavily on the OpenCV computer vision library, in its cv.jit incarnation. It’s currently in “soft launch” mode, check it out in the “Seeing” exhibit.
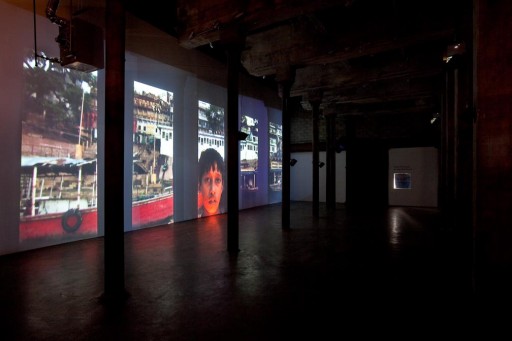 Installation view, photo by Etienne Frossard Pawel Wojtasik has a new video installation on view, at the Smack Mellon gallery in DUMBO (Brooklyn, NY). The soundtrack is by Stephen Vitiello, and I developed the software that manages the HD multi-channel projection.
“At The Still Point” was filmed in India, and covers themes of creation, destruction, and rebirth. It is presented as 5 channels of high resolution video, designed to fit in with Smack Mellon’s unique, cathedral-like physical space.
An excerpt from the piece is online on Vimeo:
It’s on show until April 11, well worth a visit! Smack Mellon is at 92 Plymouth St., Brooklyn, New York.
A little trailer about the exhibits of the Outdoor Exploratorium, located at Fort Mason. There’s far more than is shown in the video, if you’re in San Francisco check it out and go exploring!
More info at exploratorium.edu/outdoor
This video had a real 21st century workflow – all AVCHD, copied straight from SD card and edited without transcoding.

All the people going round and round, popping in and out, ending up just where they started.
Footage of Shibuya crossing in Tokyo, heavily processed optically and digitally.
Cast: Gian Pablo Villamil
Tags: japan, tokyo, ambient, strange and art

Crossing a bridge, revisited.
40 minutes to render, 4 hours of tweaking so that After Effects wouldn’t crash…
Cast: Gian Pablo Villamil
Tags: sfo and ambient

An ambient meditation on crossing a bridge. Three layers of footage, shot from a car, of the Golden Gate Bridge in San Francisco.
Cast: Gian Pablo Villamil
Tags: sfo, vehicle mount and san francisco
|
|


