Since October of last year, I’ve been working on an exciting project with filmaker and artist Lynn Hershman Leeson, an interactive installation integrated with a web-based media database called RAW/WAR. The interactive installation is constantly updated with multimedia from a companion website at rawwar.org.
I’m going to describe some of the aspects that I worked on, especially in the area of physical interface design. We worked with Paradiso Projects extensively for the design and coding of the installation and website software.
The genesis of the project comes from the film “!Women Art Revolution“, a documentary by Heshman about women in contemporary art, and how they created an entirely new, and parallel, body of work from the 1960’s onward. The film is based on over 40 years of interviews with contemporary women artists. However, Hershman realized that it was not possible to present all the stories she had gathered in a single documentary, let alone those of artists she had not been able to document. Therefore, she made available all her original material via an online archive at Stanford University, and created a website, RAW/WAR, that allowed anyone to upload documentation of their story.
For the Sundance Film Festival, Hershman was extremely interested in creating an interactive installation that would allow casual exploration of the RAW/WAR archive in an engaging manner. Starting from an observation about the film, that it was like exploring a dusty attic with a flashlight, we set about bringing this to life.
We explored a number of approaches to creating a “virtual flashlight” that would allow users to cast light on a projected room, and use it to trigger the display of images and videos. Initially we considered a system using a webcam and laser pointers – however, this required using a limited set of display technologies (front projection) and we could not limit ourselves to that option at an early stage.
It turns out that Wii videogame controllers are easily modifiable to be used with computers, and are a highly reliable and accurate pointing device. I first developed a simple proof of concept using Max/MSP, and very useful piece of software called Osculator.
This established that the Wii controllers worked reliably, and more importantly, that the illusion of casting a virtual spotlight was convincing, and interesting. We worked extensively with Paradiso Projects to develop the design further, and develop the software that would bring the installation to life.
Concept design
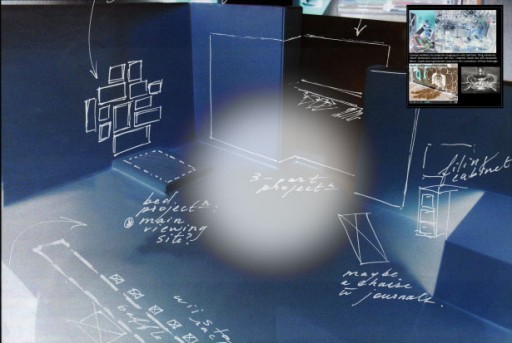
An initial concept introduced the idea of creating a sense of depth in the virtual room:
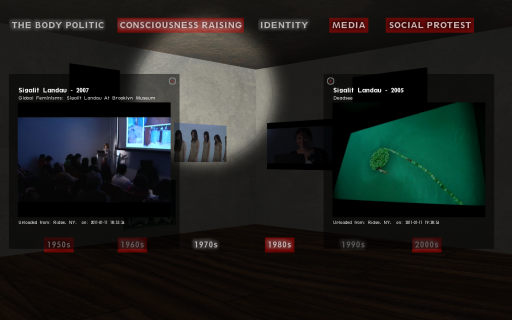
Another iteration led to a more collage-like presentation of the media, proposed by Stacey Duda and Paul Paradiso. It explores a way of presenting a lot of media at the same time, and starts converging on design elements such as the ability to filter media by decades, and by category:
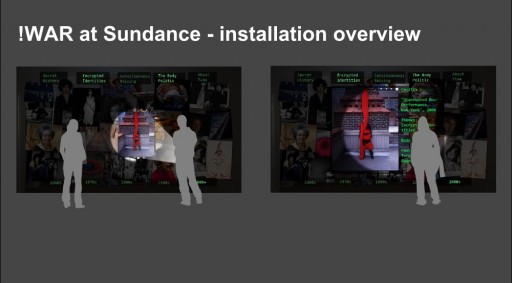
Testing this at that studio suggested that we wanted to recapture the sense of depth, that it was an extension of the space that the viewer was in. We knew by this point that the installation at the Sundance Film Festival would have the screen in a corner, and we wanted to make use of that. Hence, the final concept looked like this:
The final result looked almost identical to what was originally specified, and was aesthetically and functionally very effective. Kudos to Paradiso Projects for delivering such an outstanding result in such a short timeframe!
Physical interface
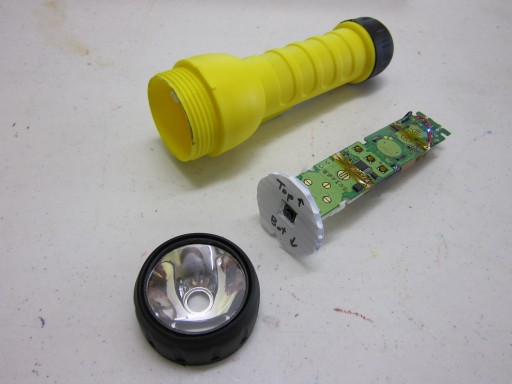
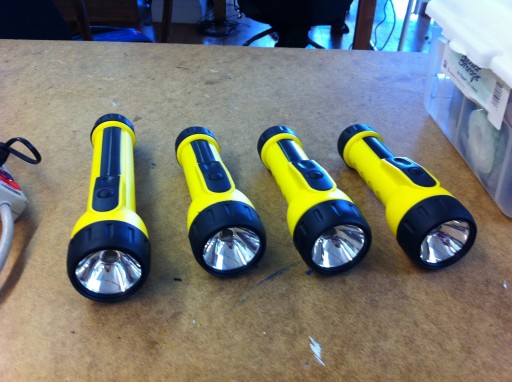
At the same time as the software for the installation was being developed, I worked on creating the physical interface. We wanted the controllers to look and behave just like real flashlights. We considered building a new flashlight-like housing for the controllers, but it seemed to make sense to try to retrofit an existing flashlight. Fortunately, the very first flashlights purchased turned out to be exactly the right size to house the guts of the Wii controller.
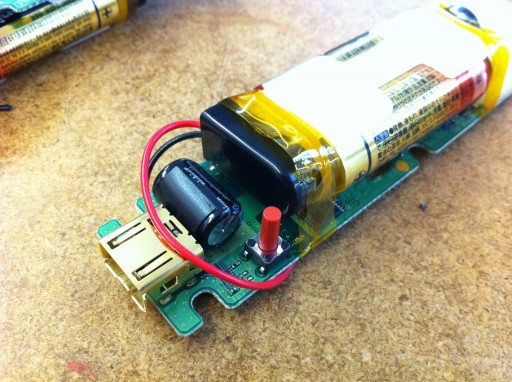
Disassembling the Wii controller required the use of special security screwdrivers, which fortunately I had already. Once the external casing was removed, I needed to add a battery holder, since the Wii battery holder forms part of the external housing. I initially tried soldering a Radio Shack battery holder directly to the existing tabs on the Wii, but this did not work. Too much heat was required for a good solder joint, and this destroyed the wiring in the battery holder. A much better option was to solder the two wires from a 9V battery snap-on connector to the solder pads on the Wii controller, and then clip the battery holder into this.
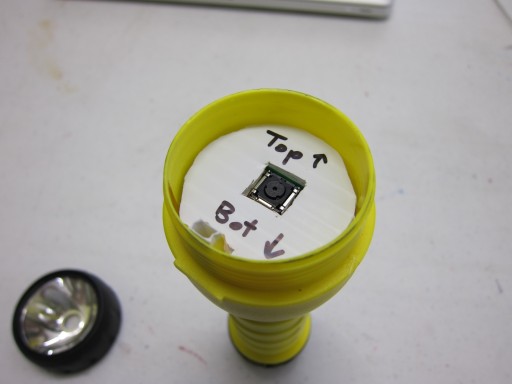
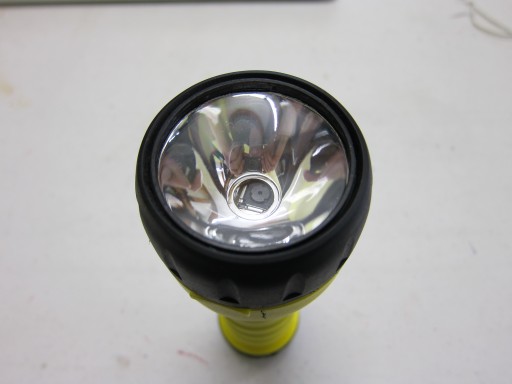
The interface for the installation was designed to work by pointing and hovering, so no access to the buttons on the Wii was necessary. I cleaned out everything in the flashlight, and found that the Wii electronics fit almost perfectly. I only had to do a little bit of machining to the reflector. The clear lens turned out to be transparent to infrared, which is necessary to allow the camera in the Wii controller to work effectively. I added a plastic disk that clipped onto the front of the Wii electronics in order to keep the camera centered and hold it in place.
I also cut a notch in the disk that matched a guide tab, to ensure that the orientation of the Wii with respect to the flashlight was always maintained. This turned out to be unnecessary: the Wii always orients itself correctly.
It was truly fortunate that we found flashlights that were the right size, could have the reflector easily machined, and had a lens that was transparent to infrared!
A final step was to remove the branding on the flashlights, using black vinyl electrical tape.
Once on-site, we needed to install an LED bar that is used by the Wii controllers to establish their position with respect to the screen. Initially, I had used a small LED bar from Best Buy, that seemed to work well in the studio environment. However, once on site we realized that the LEDs were really not bright enough to provide a good experience. It was easy for the controllers to lose sight of the LEDs, and then the installation would become erratic or unresponsive. Replacing the LED bar with a much higher-powered one led to a huge improvement in performance. However, this turned out to be a weak link, since it tended to go through batteries really quickly. Going forward, a USB-powered LED bar seems to be a much better option.
In general, the Wii flashlights performed well. However, there were a a couple of rough spots. The first was that the scaling of the position returned by the Wiis needed to be scaled for each venue – the Wiis are designed to work with much smaller screens. The second issue had to do with establishing a connection between the computer that runs the installation, and the Wii controllers. Nintendo uses a proprietary system for doing this with the game console, whereas Osculator requires the connection to be established manually every time the installation runs. We were able to teach the volunteers from the Sundance organization how to do this, but it would be good to automate the process. This was by far the most complex part of keeping the piece running.

